How to Clean Your Commercial Gas Burner Without Damaging It
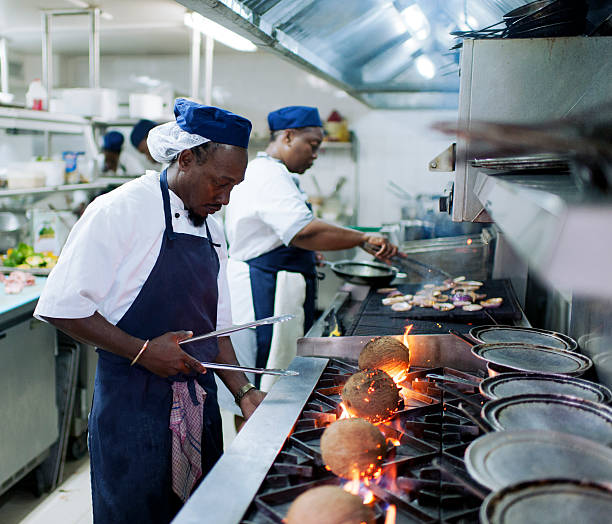
A commercial gas burner is one of the most essential pieces of equipment in any professional kitchen, and its proper functioning should never be taken for granted.
As a business owner running a commercial kitchen, keeping your burners in top condition is critical to meeting customer demand, ensuring safety, and protecting your investment.
The cleanliness of this burner, though often overlooked, is a key determinant of how much of your customers’ orders you can meet in a day as well as the lifespan of your investment.
Imagine you own a restaurant in Lekki, Lagos, and it’s a busy lunchtime where every minute counts, and all of a sudden your burner is burning haphazardly, or has even refused to burn. This small error can go a long way to impact your customer’s satisfaction, which would in turn determine your business growth.
To avoid finding yourself in such situation is the reason why I’m writing this article for you, to show you what you need to do and what you shouldn’t do when it comes to cleaning your commercial gas burner.
Adhering to these best practices will not only ensure your kitchen meets rigorous health and safety standards but will also optimize your burners’ performance, extend their lifespan, and ultimately contribute to a more profitable and secure food business.
Let’s get into it.
1. Prioritize Safety First
Prioritizing safety is non-negotiable when cleaning your commercial gas burner. Before touching the burner, ensure the main gas shut-off valve is turned off completely to eliminate the risk of accidental gas leaks.
Additionally, make sure the burners are completely cool, as residual heat can cause severe burns or damage the components. Allow ample time for the unit to cool down after its last use, preferably overnight or for several hours.
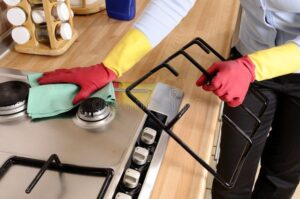
When cleaning, wear appropriate personal protective equipment (PPE) such as heavy-duty rubber or nitrile gloves and safety glasses or goggles to protect yourself from harsh chemicals and sharp edges.
Ensure adequate ventilation in the kitchen by opening windows, turning on extractor fans, and running the ventilation system effectively to clear the air of potential fumes from cleaning chemicals.
By prioritizing safety, you protect your staff and establishment from potential hazards.
2. Dismantle Detachable Parts Correctly
To effectively clean your commercial gas burner, start by dismantling the detachable parts correctly. Carefully lift off burner grates, burner heads, burner caps, and any underlying drip trays.
Some models may have additional removable parts, so be sure to take note of each component. As you remove the parts, pay attention to their specific placement to ensure proper reassembly later.
To aid in reassembly, consider taking a quick photo with your phone to capture the correct order and placement of the parts. Handle the components with care, as they can be heavy and brittle if dropped.
Cast iron grates, in particular, require gentle handling to avoid damage. By systematically removing and carefully handling the parts, you’ll be able to give each component the attention it needs for a thorough cleaning.
3. Soak Detachable Parts in the Right Solution
Soaking is a crucial step in cleaning detachable parts of your commercial gas burner. Fill a large sink or sturdy tub with hot water and add a generous amount of heavy-duty degreaser or strong dish soap designed for commercial kitchens.
For tougher buildup, consider a specialized oven cleaner, ensuring it’s safe for the material and following the manufacturer’s instructions. Submerge the removable grates, burner heads, and caps completely in the solution.
Allow the parts to soak for at least 30 minutes to an hour, or even overnight for really tough, caked-on residue. The longer they soak, the easier they’ll be to clean. The solution will break down the grime effectively, significantly reducing the effort required for scrubbing.
This simple step can work wonders in removing stubborn, baked-on grease and carbon, making the cleaning process much more efficient.
4. Use the Right Cleaning Tools for each part
Using the right cleaning tools is essential to effectively clean your commercial gas burner without causing damage. For general scrubbing, use non-abrasive brushes like stiff-bristled nylon brushes for grates and burner heads.
For tougher buildup, consider a brass-bristle brush on cast iron, but avoid it on softer metals like aluminum to prevent scratching.
For specific tasks, use the following tools: scrapers for removing large carbon buildup, small wires or toothpicks for clearing blockages in gas ports, and microfiber cloths and sponges for wiping down surfaces and final polishing.
A straightened paperclip or a small wire brush designed for burner orifices can also be effective for clearing gas ports without damaging them. By using the right tools, you’ll ensure a thorough and safe cleaning process.
5. Thoroughly Rinse and Dry All Parts
After scrubbing the dismantled parts, thoroughly rinse them under running water to remove all residue of soap, degreaser, and loosened grime. This step is crucial to prevent any leftover residue from burning onto the surface during the next use, which can create more buildup or unpleasant odors.
Ensure all parts are rinsed clean to maintain their effectiveness and longevity.
After rinsing, dry all parts completely, paying extra attention to cast iron components like grates and burner caps, which are prone to rust if left wet.
You can air dry them, wipe them down with a dry cloth, or use residual heat in a low-heat oven to ensure they’re absolutely dry. Be cautious not to let water enter the internal gas lines or igniter components to prevent damage and ensure safe operation.
6. Reassemble Carefully and Test
When reassembling your commercial gas burner, ensure each part is placed in its exact original position. Refer to your notes or photos from the disassembly process to guarantee correct placement.
Components are often designed to fit only one way, so take your time to ensure everything is securely fastened and aligned. Loose parts can shift during cooking, affecting heat distribution or even causing instability.
Once reassembled, test each burner individually by turning on the gas supply and lighting it. Observe the flame: it should be a consistent blue color with distinct, stable cones.
Any irregularities, such as yellow or orange flames, flickering, or popping sounds, indicate an issue that needs further investigation. Additionally, perform a quick smell test for gas after reassembly.
If you detect any gas odor, turn off the gas immediately, ventilate the area, and do not use the burner until the leak is identified and fixed by a professional.
7. Clean the Cooktop Surface Regularly
Regular cleaning of the cooktop surface is crucial to maintaining a safe and hygienic kitchen. Make it a standard practice to wipe down the surface daily, or even after each significant cooking session, using a damp cloth with a mild degreaser. This will help prevent the accumulation of grease and food particles, which can become a fire hazard and a breeding ground for pests.
Immediate spill cleanup is also essential. Don’t let spills sit, especially sugary substances that can caramelize and harden, becoming difficult to remove and potentially damaging the surface.
Address spills as soon as the surface is cool enough to touch safely. By staying on top of cooktop surface cleaning, you’ll ensure a cleaner, safer, and more efficient kitchen.
8. Maintain a Regular Cleaning Schedule
To keep your commercial kitchen running smoothly, establish a regular cleaning schedule. Daily tasks should include wiping down cooktop surfaces and cleaning up spills to prevent grime and stains from building up.
Weekly, take the time to remove and deep clean grates, burner heads, and caps, as well as thoroughly clean drip trays. This consistent effort will help maintain a clean and safe kitchen.
On a monthly or quarterly basis, conduct a more comprehensive inspection of all components, including checking igniters and gas connections.
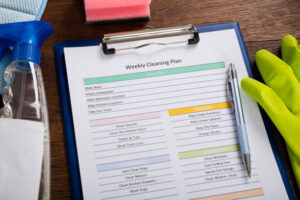
It’s also essential to keep a log of your cleaning schedule, documenting each task and inspection. This helps ensure compliance with health regulations and provides a valuable record for maintenance, allowing you to track progress and identify areas for improvement.
By staying on top of cleaning and maintenance, you’ll ensure a well-run kitchen that meets high standards of safety and hygiene.
Conclusion
A clean commercial gas burner isn’t just about aesthetics, it’s a critical part of running a safe, efficient, and profitable food business. Ignoring its maintenance can lead to equipment failure, fire hazards, customer dissatisfaction, and ultimately, revenue loss.
Following these cleaning best practices, prioritizing safety, using the right tools, and establishing a regular cleaning routine protects your investment, maintains consistent food quality, and positions your business for long-term growth.
More articles for you
Top 10 Must-Have Kitchen Appliances for Food Vendors in Nigeria
Buying vs. Leasing Kitchen Equipment: Which is Better for Nigerian Restaurants?
Where to Buy the best Commercial Cooking Ranges in Nigeria
15 Essential Industrial Kitchen Equipment for Making Pastries